


What’s up guys, Jeff Cavaliere, Athleanx.com. If you’re tired of your stomach sticking out and you want to do something about it, well, guess what? You’ve come to the right place, because as always, guys, in my 22-day series, I’m going to give you a step-by-step, day by day. No failed game plan for making that happen.
I will make sure that it’s flatter than it is right now. But can we talk about that for a second? What does it look like right now? Because, you know, context matters and I’m not going to BS you.
If it looks like this, then you can probably add a zero to the end of the 22 because obviously there are some nutritional faults here that are leading to these high levels of body fat that’s contributing to large parts of the protrusion of that belly.
But you see, this isn’t a problem just for people at high body fat levels. This happens to people at low body fat levels too. Their belly sticks out no matter how much ab work they do or how good their diet is. But guess what? Regardless of what your body fat level is, the plan here is going to help you because it’s going to revolve around one of the most overlooked aspects of a protruding abdomen, and that is the under activity of two of the most important core muscles we just don’t work enough, the Transverse Abdominis and the Pelvic Floor.
And the good news is you won’t only see the benefits of this from a vanity standpoint, but you’re going to realize that these muscles also impact the stability of your low back.
So, we’re not just going to be looking better, but we’d be feeling better as well. So now, before we start laying out exactly what you’re going to do step by step in those 22 days, I want to show you why what you’re going to work on is going to have the effect it will for you and how it’s going to benefit you because we have to talk about those two muscles again. If we start from the bottom up, the Pelvic Floor, this would be a bad Pelvic Floor because this sheet of paper here in this position doesn’t provide much stability. However, you can see that if I were just to roll it up from the bottom just like this, that now in this position with is a lot smaller in this contracted position, the paper itself has gained a lot more stability.
And similarly, the Transverse Abdominis, I’ve told you before that it works like a weight belt, it’s your internal weight belt. It runs around your body like this right around your waist and we know that when we can tighten it, it provides a cinching down effect, which is going to obviously narrow your waistline and keep it tighter.
So, if we can work those two muscles and figure out a way to activate them and more importantly, wake them up because they haven’t been working enough as it is, then we can start to have a real effect on being able to flatten out that stomach of yours. So now the success you’re going to have over the next 22 days is going to hinge on your ability to contract those two muscles and how to learn how to do that properly. Now, I’m going to give you a couple of crude methods here, but they work and they’re good visualizations.
The first is the Pelvic Floor. Two ways to figure out how to do this, guys, if you were urinating and you need to stop the flow midstream, that would be the Pelvic Floor that does that. The second thing is if you had a straw up your butt, you had to drink a glass of milk or whatever else your favorite beverages, you’d have to use the Pelvic Floor in order to get that done. Visualize that and engage that, you could do it right now and feel what that feels like.
The next thing is the Transverse Abdominis.
You need to feel like you’re walking into an ice-cold bath of water, contracting the Transverse Abdominis, which is giving that weight belt shrinking effect down, is bringing your belly button closer to your spine. If you can get those two sensations, you’re going to master this and make this work for you as nothing else has before. So now how do we do this, guys? Over the course of the 22 days, we have to start, as always, with a test, because I don’t want you just to take my word for it, I want you to have objective feedback to realize that, yes, this is actually working for you. So, the first one actually, though, is subjective.
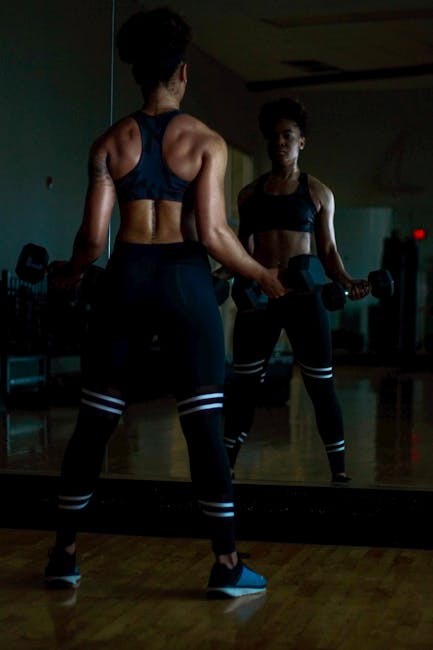
I want you to stand in front of a mirror and just take a look at yourself on days zero and see how much your stomach is protruding.
On day 22, we’re going to come back and notice the difference, maybe even take a side-by-side photo. The next thing to do is the objective measurement, though, and it’s called the leg lowering test. And it’s going to tell us how we improve in the strength of those two muscles as we work through that over the course of the next 22 days. You start with your legs up as high as you can, you engage the Pelvic Floor, as I just told you, you engage the Transverse Abdominis like I just told you and you start to lower your legs down.
You need to keep your low back in contact with the floor the entire time your legs come down. The goal would be to get them all the way down to just an inch above the floor without your low back arching, signifying that you’ve lost a contraction of the Transverse Abdominis in the Pelvic Floor.
If you can get it all the way down to an inch above the floor, then how long could you hold it? So, on days zero, you’re looking for the point at which your low back comes off and that is your measuring point. And we are looking for on day 22 is the ability to get your legs lower before your arch happens or you get it all the way down to the ground and you hold that for a longer period of time.
So now with those two tests in place now is when the fun starts, because now we start working on this day by day. And again, a very micro commitment I’m asking for, for a big payoff at the end. We start in the laying down position because, guys, we need to change that posture. Again, just because you can control these two muscles in one posture does not mean you can control them everywhere else.
And all I want you to do is learn how to contract the two muscles in that position.
First, the Pelvic Floor, and then stack on top of that, the Transverse Abdominis. And all you’re going to do is hold this for twenty seconds. Ten repetitions, that will equal three minutes and 20 seconds. You’re going to do this three times throughout the day. That’s 10 minutes, that’s all I’m asking.
On day two, we’d go into this hollowed-out position and then just simply lifting our shoulders off the ground. But once again, now in that position, feet can be down engaging the Pelvic Floor in the Transverse Abdominis together and holding it for 20 seconds, 10 repetitions, repeat that three times.
Again, the ask is pretty small, but as you go through these days, you’re going to start to gain significant control over the muscles that have been dormant until now. On day three, we change now to the V-Sit position and becomes a little bit more challenging as we work. But again, we’re just looking for a nice static contraction.
We hold it for 20 seconds, 10 repetitions. Proceeding through this now we go into a plank. You guys know I’m not a huge fan of the plank, but in terms of the positioning here, it gives us a new challenge.
Now we have gravity pushing down and that belly that’s already sticking out. So, can you actually pull back and do the same thing and activate those two muscles in this different position?
Again, the idea is it could feel foreign and it could feel like it’s a little bit new, but if you can gain control here, you’re well on your way to where you want to be. Next to go into this elevated plank position, which is a transition towards standing, but still the same type of challenge. Can you get in this position, create the contraction you’re looking for, hold it for 10 sets of 20? Again, day by day, guys, very little ask big payoff at the end. We then move to this kneeling position.
This is where it starts to become a lot more challenging. The vertical torso here makes it a lot harder for you to gain control of these muscles. But it’s no less important because, as you know, we’re transitioning to standing where we come most functional. Hold it for 20 seconds apiece, 10 repetitions, and your work is done for the day.
On day seven, we wrap up this static portion of our 22-day plan by going into standing and doing the same thing.
And again, this is going to be the most challenging position for a lot of people. But given that you’ve already gained some additional control over the muscles over the course of the first six days, it’s should start to feel like it’s wired now and something that you can actually have control over.
So now the first seven days down where we go from here, well, now we need to take it to the next level because ultimately, we have to be able to just move and not just be able to hold and stand with the control of those muscles. So we have a dynamic addition to those. We’re going to start back on day eight in that laying down position, we’re going to add a little bit dynamic movement with a flutter.
Can you still hold control of those two muscles with the additional flutter of the legs at this point? Now you can do 20 repetitions, but for half the time. I understand that doing the additional movement can become more challenging, so we’ll decrease the time you have to do it. But can you do this more often? It’s still going to be three minutes and 20 seconds.
You’re still going to do all of these drills for 10 minutes in the course of a day. Three times you’re doing these three minutes and 20-second sessions. The next position, again, is going to be that hollowed-out position. But now we’re going to add the Hollow Rock exercise. Can you take that same stability and now apply it in a dynamic environment and create this rocking back and forth?
Again, do it for 10 seconds at a time, 20 repetitions, three times a day. On the third day of the second seven-day block, now we’re going back to V-Sit and now I want to see if we can just do this drift. Drifting the hands back and forth, creating a little bit of that disturbance left or right, but still require that you have the stability control, those two muscles in that position. We move on now to the plank. In this case, we’re doing something called a Step Out Plank.
Again, establish the Pelvic Floor and Transverse Abdominis contraction, and now step one foot out to the side. You can see that by having one foot off the ground at one point, you’ve introduced more instability. But if you have good control and you’re building the right control here, you’re going to be able to do this without any disturbance in your ability to maintain that flat stomach. You then move into the Elevated Plank position here.
You just do this knee drive, bring one leg in towards your elbow, bring the other knee in towards your elbow, continue to work this through your 10 seconds here again, 20 repetitions of these 10 second alternating knees.
We move into that kneeling position now. Again, it was challenging before, we’re going to make it more challenging by adding some frontal play and movement. Can you just walk yourself laterally back and forth while maintaining that tight contraction and that flattened-out stomach? And then finally we go into the last one here in standing here do the same exact thing if we add some lateral movement to the standing position while still maintaining that contraction of the Transverse Abdominis and Pelvic Floor. So now you’re through 14 days of the plan.
You’ve got one last seven-day block here, how are we going to do this? Well, we’re now going to see if you can combine both of them. You go into each of those original seven positions are now going to perform just five of them for 20 seconds instead of the 10 that you originally did. And then we add the dynamic portion that corresponds to that position. This time now, five repetitions, but we’re going to double the length of time they have to do it before it was just a 10 ask, now it’s a 20 second ask.
However, combined all that work again is going to take three minutes and 20 seconds. You’re going to do that three times a day, still just asking 10 minutes of you. And guys, that brings us to day 22, the last test here. Remember all you have to do, go back and check that mirror and look and see how flat your belly has become.
Even if you were at those higher body fat levels, you’re going to see a tightening or a cinching down the waistline if you’ve gained some good control of these once dormant muscles.
And of course, I want that leg lowering test to be done again too, to see if you can get those legs lower without seeing the low back pop up. And remember, he didn’t just improve the appearance of your waistline, you improved the strength and stability of your lower back at the same time. And so they have a guy step by step.
As always here, I’m laying out the game plan for you so you can check it out, take a screenshot, take it with you and make sure you follow it day by day. Guys remember, it’s not a big ask and there’s a big payoff at the end.
If you can follow this, I promise it works. Don’t just take my word for it. Make sure you leave your comments below, tell me how you’re doing. Take your pictures, share them. Make sure you show me how you’ve done.
I know it’s going to work for you if you put the work in. Talking about that, guys, you’re looking to put more work in and you’re looking for a step-by-step game plan and even a nutrition plan that’s going to help you to get those body fat levels down significantly, we have step by step meal plans with all of our programs. They’re available over Athleanx.com.
In the meantime, if you found the video helpful, leave your comments and thumbs up.
Let me know what I can do in other videos to bring the same type of value to you. And also, if you haven’t already done so, make sure you click subscribe and turn on your notifications so you never miss a new video when we put one out. All right guys, good luck. See you soon.


